Minggu, 26 Januari 2025

Pallet Wood Picture Frames

Posted by pendi with No comments

Crafting Rustic Elegance: A Comprehensive Guide to Pallet Wood Picture Frames

The inherent rustic charm and sustainable nature of reclaimed pallet wood have propelled it to the forefront of DIY and crafting trends. Among the myriad of projects possible with this readily available material, the creation of picture frames stands out as a particularly rewarding endeavor. This comprehensive guide will explore the multifaceted process of crafting stunning pallet wood picture frames, from material selection and preparation to finishing techniques and design considerations. We will delve into the nuances of achieving a professional finish, ensuring your handcrafted frames become cherished pieces of home décor.

Selecting and Preparing Pallet Wood

The foundation of any successful project lies in the quality of its materials. Selecting appropriate pallet wood is crucial for creating durable and aesthetically pleasing frames. Not all pallets are created equal; some are treated with chemicals, while others are constructed from different types of wood.

Identifying Suitable Pallet Wood

Prioritize pallets marked with an "HT" stamp, indicating heat treatment. This ensures the wood is free from harmful chemicals and safe for indoor use. Avoid pallets marked with an "MB" stamp, signifying methyl bromide treatment, a fumigant that is toxic. Examine the wood for signs of rot, damage, or excessive weathering. Select planks that are relatively straight and free from significant knots or warping, as these can complicate the framing process. The type of wood is also a factor; hardwoods like oak or pine offer superior durability and a more refined aesthetic compared to softer woods.

Disassembling and Cleaning the Pallet

Once suitable pallets are identified, careful disassembly is essential. Use a pry bar or crowbar to gently separate the planks, taking precautions to avoid splintering the wood. After disassembly, thoroughly clean the planks to remove any dirt, debris, or lingering remnants of previous use. A wire brush can effectively remove surface grime, while a pressure washer can be used for more stubborn dirt, provided the wood is not excessively weathered. Always wear appropriate safety gear, including gloves and eye protection, during this process.

Plank Selection and Sizing

After cleaning, carefully inspect each plank for imperfections. Select the straightest, most aesthetically pleasing planks for your frame. Measure the dimensions of your chosen picture or artwork to determine the required frame size. Allow for additional wood to accommodate the mitered joints (or other joining methods) that will form the corners of the frame. Accurate measurements are crucial to ensure a well-fitting and visually appealing final product.

Constructing the Pallet Wood Frame

This section outlines the key steps in assembling the picture frame. While various joining techniques exist, mitered joints offer a classic and aesthetically pleasing solution.

Cutting the Wood to Size

Use a miter saw or hand saw to accurately cut the planks to the calculated dimensions. Precise cuts are vital for a professional-looking frame. For mitered joints, set the saw to a 45-degree angle. If using a hand saw, utilize a miter box to ensure accuracy. Multiple test cuts on scrap wood are recommended to refine your cutting technique before working with the final planks.

Creating Mitered Joints

Once all planks are cut, assemble the frame by joining the mitered ends. Wood glue is essential for strengthening the joints. Apply a generous amount of glue to the mating surfaces of each joint. Clamping the joints is crucial for maintaining alignment and allowing the glue to set properly. Use clamps appropriate for the wood thickness and frame size. Allow the glue to cure completely before proceeding to the next stage.

Reinforcing the Frame (Optional)

For added strength and stability, consider reinforcing the mitered joints with small wooden dowels or brads. Drill pilot holes to prevent splitting the wood before inserting the dowels or driving in the brads. This step is particularly recommended for larger frames or frames intended to hold heavier artwork.

Finishing the Pallet Wood Frame

The finishing process transforms the raw pallet wood into a polished and visually appealing piece. This stage allows for customization and the enhancement of the frame's rustic charm.

Sanding and Smoothing

Thorough sanding is essential to achieve a smooth surface and eliminate any splinters or rough edges. Start with coarser grit sandpaper (e.g., 80-grit) to remove significant imperfections, progressively moving to finer grits (e.g., 120-grit, then 220-grit) for a progressively smoother finish. Sand in the direction of the wood grain to avoid scratching the surface. Pay close attention to the corners and edges, ensuring a consistent finish.

Applying a Finishing Coat

The choice of finish depends on the desired aesthetic and level of protection. Several options are available:

  • Clear Sealant: This protects the wood's natural beauty while highlighting its texture and grain. Several types are available, including water-based and oil-based sealants.
  • Stain: Stains enhance the wood's color and grain, adding depth and character. A wide range of colors is available to suit individual preferences.
  • Paint: Paint provides a more uniform and opaque finish, covering the wood's natural color and texture. Chalk paint is a popular choice for achieving a rustic or vintage look.

Apply the chosen finish according to the manufacturer's instructions. Multiple thin coats are generally preferable to one thick coat, ensuring even coverage and preventing drips or runs. Allow each coat to dry completely before applying the next.

Adding Hardware

Once the finish is completely dry, attach the frame's hardware. This may include picture hangers, D-rings, or sawtooth hangers, depending on the size and weight of the artwork. Ensure the hardware is securely attached and capable of supporting the weight of the picture without damage.

Design Considerations and Variations

The beauty of pallet wood picture frames lies in their versatility. Numerous design variations can be explored to achieve unique and personalized results.

Incorporating Other Materials

Consider incorporating other materials to enhance the frame's design. Metal accents, beads, or fabric scraps can add a touch of personality and visual interest. These additions can be applied before or after the finishing process, depending on their nature and intended placement.

Distressing Techniques

To further enhance the rustic aesthetic, consider employing distressing techniques. This might involve strategically sanding certain areas to create a weathered or worn appearance. Controlled chipping or cracking can also add to the frame's character. Experimentation is key to achieving the desired level of distressing.

Shape and Size Variations

While rectangular frames are common, explore alternative shapes. Circular or irregularly shaped frames can add a unique touch. The size of the frame should be carefully considered in relation to the artwork and overall décor.

By carefully following these steps and incorporating your creativity, you can craft stunning pallet wood picture frames that add a touch of rustic elegance to any space. Remember that attention to detail in each stage, from material selection to finishing touches, is paramount in achieving a professional and aesthetically pleasing result. Embrace the imperfections inherent in reclaimed wood; these imperfections often contribute to the unique charm and character of the final product.

Wooden craft ideas for creating personalized gifts

Posted by pendi with No comments

Unleash Your Inner Craftsperson: Personalized Wooden Gift Ideas

Forget generic presents! This year, impress your loved ones with a truly unique and heartfelt gift crafted from wood. With a little creativity and some readily available materials, you can transform simple wood pieces into cherished keepsakes. Whether you're a seasoned woodworker or a complete beginner, these ideas offer something for everyone, ensuring your gifts are as individual as the people you're giving them to.

Engraved Wooden Keepsakes: A Touch of Personalization

Engraving offers a simple yet elegant way to personalize your wooden gifts. A clean, crisp engraving adds a timeless touch to various wooden items. You can opt for a laser engraver for precise detail or a hand-held rotary tool for a more rustic feel. The possibilities are endless! Consider engraving a loved one's initials, a special date, a meaningful quote, or even a cherished photograph onto a smooth piece of wood. The beauty of engraving lies in its ability to transform an ordinary piece of wood into a deeply personal treasure.

Ideas to Get You Started:

  • Personalized Coasters: Engrave each coaster with a family member's initial or a fun design.
  • Custom Cutting Boards: Create a unique cutting board with a family recipe or a funny inside joke engraved onto the surface.
  • Engraved Keychains: Design simple but elegant keychains bearing names, dates or symbols of special meaning.

Wooden Boxes: Holding Memories and More

Constructing a wooden box provides an opportunity for both creativity and practicality. You can create a small jewelry box, a larger keepsake box for treasured mementos, or even a unique storage solution for a specific purpose. Start with a simple design, maybe a small square or rectangular box. Consider adding intricate details like inlaid wood, carved designs, or even hand-painted accents. The wood itself lends itself to various finishing techniques: staining to bring out the wood grain, painting for a bolder look, or leaving it natural for a rustic charm. The final product will not only be a beautiful gift, but a functional and personalized piece that will be cherished for years to come.

Box Design Inspiration:

  • Heart-shaped Jewelry Box: A classic choice for holding precious necklaces and earrings.
  • Personalized Spice Box: Create a set of small boxes for holding spices, each labeled with the spice name.
  • Custom-sized Storage Box: Design a box specifically to hold a loved one's collection of something special â€" buttons, stamps, or even small toys.

Beyond the Basics: Advanced Wooden Craft Projects

For those with more woodworking experience, more ambitious projects present themselves. Consider building a custom-designed wooden frame for a cherished photograph, crafting a personalized wooden toy for a child (think a unique car or rocking horse), or even creating a beautifully crafted wooden clock. These projects demand more time and skill, but the resulting gifts will be truly exceptional and demonstrate an unmatched level of care and thoughtfulness. Remember to plan your project carefully, sketching out designs and gathering all necessary tools and materials before you begin. The satisfaction of completing a challenging project and gifting the result to someone special is incredibly rewarding.

Challenging but Rewarding Projects:

  • Custom-made Wooden Toys: A wooden puzzle, a dollhouse, or a miniature rocking chair.
  • Photo Frame with Intricate Carvings: Showcase a family photo in a one-of-a-kind frame.
  • Unique Wooden Clocks: Create a clock with a unique design, incorporating personal elements.

No matter your skill level, crafting a personalized wooden gift offers a deeply satisfying experience. The time and effort you invest will be evident in the final product, creating a present that speaks volumes about your love and appreciation for the recipient. So, grab your tools, choose your wood, and get ready to create something truly special!

Easy DIY wooden craft ideas for adults

Posted by pendi with No comments

Accessible Wooden Craft Projects for Adult Beginners

The inherent beauty and versatility of wood make it an ideal medium for crafting. For adults seeking engaging and rewarding DIY projects, woodworking offers a multitude of possibilities, regardless of prior experience. This article explores a selection of easy-to-execute wooden craft ideas, perfect for beginners seeking a fulfilling and creative outlet. These projects emphasize simplicity and readily available materials, ensuring an enjoyable and accessible experience for all skill levels.

Simple Wooden Coasters

Creating personalized wooden coasters is an excellent introductory project for novice woodworkers. This project requires minimal tools and materials, making it ideal for beginners.

Materials Required:

  • Small pieces of wood (approximately 4 inches square). Untreated wood blocks are readily available at craft stores.
  • Sandpaper (various grits, starting with coarser grit and progressing to finer grit).
  • Wood stain or paint (optional, for added personalization).
  • Polyurethane sealant (to protect the coasters from moisture).
  • Soft cloth.
  • Pencil.

Instructions:

  1. Sanding: Begin by sanding the wooden squares. Use coarser grit sandpaper initially to smooth out any rough edges and imperfections. Gradually switch to finer grit sandpaper to achieve a smooth, even finish. Pay close attention to the corners and edges.
  2. Optional Decoration: Once the sanding is complete, you can personalize your coasters. You might apply wood stain for a natural, rustic look, or paint them with vibrant colors. Allow the stain or paint to dry completely according to the manufacturer's instructions.
  3. Sealing: Apply a thin, even coat of polyurethane sealant to protect the coasters from spills and moisture. Let the sealant dry thoroughly before handling. Consider applying multiple thin coats for enhanced durability.
  4. Finishing Touches: After the sealant has dried, gently buff the coasters with a soft cloth to remove any excess residue and enhance their shine.

This project allows for considerable creative freedom. Consider adding decorative elements like decoupage, stencils, or burned designs for a more personalized touch.

Rustic Wooden Key Holders

A functional and aesthetically pleasing key holder is another straightforward project perfect for beginners. This project combines simple woodworking techniques with the opportunity for creative expression.

Materials Required:

  • A piece of wood (approximately 6 inches wide and 8 inches long). Reclaimed wood adds character but is not essential.
  • Sandpaper (various grits).
  • Wood glue.
  • Small hooks (metal or wooden).
  • Wood stain or paint (optional).
  • Polyurethane sealant (optional).
  • Screws or nails (to attach the hooks).

Instructions:

  1. Preparation: Sand the wooden board thoroughly to achieve a smooth surface. Remove any splinters or rough edges.
  2. Hook Placement: Plan the arrangement of the hooks on the board. Mark the locations with a pencil.
  3. Attaching Hooks: Securely attach the hooks using screws or nails, ensuring they are firmly fixed in place. Consider pre-drilling pilot holes to prevent the wood from splitting.
  4. Finishing: Apply wood stain or paint, if desired. Let it dry completely. Apply a sealant for extra protection.

This project can be further customized by adding a decorative element, such as a small wooden plaque with the family name or a personalized inscription.

Charming Wooden Photo Holders

Creating a simple wooden photo holder is a delightful project that combines practicality and visual appeal. This project is particularly suitable for displaying cherished memories.

Materials Required:

  • Small wooden dowels or clothespins.
  • Small wooden block or square piece of wood.
  • Sandpaper.
  • Wood glue.
  • Small binder clips or clothespins.

Instructions:

  1. Preparation: Sand all wooden pieces thoroughly to ensure a smooth finish.
  2. Assembly: Arrange the dowels or clothespins in a desired pattern on the wooden block. Secure them with wood glue. Allow the glue to dry completely.
  3. Attachment: Secure small binder clips to the ends of the dowels or clothespins. These will hold the photographs in place.

This project lends itself well to creative variations. Use different types of wood, add decorative elements, or adjust the size and shape of the holder to fit your needs. You can also stain or paint the wood to match your decor.

Decorative Wooden Trays

Wooden trays are both functional and visually appealing. This project offers a chance to experiment with different shapes and sizes, adding a personalized touch to your home decor.

Materials Required:

  • Thin wooden planks or plywood.
  • Wood glue.
  • Clamps.
  • Sandpaper.
  • Wood stain or paint (optional).
  • Polyurethane sealant (optional).

Instructions:

  1. Cutting: Cut the wooden planks to the desired shape and size for your tray. You'll need pieces for the base and sides.
  2. Assembly: Apply wood glue to the edges of the base and sides. Carefully assemble the tray, ensuring the sides are securely joined to the base. Use clamps to hold the pieces in place while the glue dries.
  3. Sanding: Once the glue has dried completely, sand the tray thoroughly to smooth any rough edges or seams.
  4. Finishing: Apply wood stain or paint if desired. Then, apply a protective layer of polyurethane sealant to enhance durability.

The design of your tray is limited only by your imagination. Consider incorporating decorative elements, such as inlays or carved designs, to make your tray truly unique. Remember to always prioritize safety when using woodworking tools.

These simple wooden craft projects are excellent starting points for anyone interested in exploring the world of woodworking. Remember to always prioritize safety and use appropriate protective gear. With a little patience and creativity, these projects can be transformed into unique and cherished items for your home or as thoughtful gifts for others.

Modern Pallet Wood Wall Art

Posted by pendi with No comments

Modern Pallet Wood Wall Art: Upcycling Rustic Charm

Hey there, fellow DIY enthusiasts! Let's talk about something I'm seriously obsessed with lately: transforming humble pallet wood into stunning, modern wall art. I know, I know, "pallet wood" sounds a little…rustic. But trust me, with a little creativity and elbow grease, you can create pieces that are both effortlessly chic and totally unique. Forget those mass-produced prints; let's dive into the world of personalized, sustainable, and seriously stylish wall décor!

Why Pallet Wood? It's More Than Just a Trend

Before we get into the nitty-gritty of projects, let's chat about why pallet wood is such a fantastic material. It's not just a fleeting trend; there are some really solid reasons to give it a try:

Sustainability Superstar

First off, it's incredibly sustainable! Pallet wood is reclaimed, meaning it's given a new life instead of ending up in a landfill. This reduces waste and makes your art a little more eco-friendly â€" a win-win, right?

Unique Texture and Character

The beauty of pallet wood lies in its imperfections. Those weathered knots, cracks, and variations in color add so much character that you just can't replicate with brand-new lumber. Each piece is truly one-of-a-kind!

Budget-Friendly Bliss

Let's be real, budget is often a factor when we're decorating. Pallet wood is surprisingly affordable (often free if you know where to look!), making it a fantastic choice for those on a budget.

Endless Possibilities

From minimalist geometric designs to bold, statement pieces, the versatility of pallet wood is simply amazing. Your imagination is the only limit!

Sourcing Your Pallet Wood: Where to Find Your Treasures

Now that you're convinced (I hope!), let's talk about getting your hands on some pallet wood. Don't just head to the nearest lumber yard; there are some clever places to source your materials for free or very cheaply:

  • Local Businesses: Many businesses â€" construction sites, breweries, even grocery stores â€" use pallets and are often happy to give them away. Just be sure to ask permission first!
  • Craigslist/Facebook Marketplace: Check these online classifieds; people often list free pallets or sell them for a very low price.
  • Recycling Centers: Some recycling centers collect pallets and might be willing to let you have some. It's always worth a shot!
  • Friends and Family: Spread the word to your network. Someone might know someone who has pallets they're looking to get rid of!

Important Note: Always make sure the wood is heat-treated (look for the HT stamp) and safe for indoor use before you start your project. You don't want any unwanted pests or chemicals in your home!

Preparing Your Pallet Wood: Cleaning and Disassembly

Once you've got your pallets, there’s a bit of prep work involved. This isn't rocket science, but it's crucial for a successful project:

Cleaning Up

Pallet wood can be pretty dirty. Give each board a good scrub with soap and water, and let them dry completely. You might need to use a wire brush to remove stubborn dirt or grime.

Disassembly

Carefully disassemble your pallets using a hammer and pry bar. Be cautious; some nails are quite stubborn! Wear safety glasses to protect your eyes.

Sanding is Key

Once the boards are clean and dry, sand them down to remove any splinters or rough edges. Start with coarser sandpaper and gradually move to finer grits for a smoother finish.

Project Ideas: Unleash Your Inner Artist

Okay, the fun part! Here are a few ideas to inspire your pallet wood wall art creation:

Geometric Masterpieces

Cut your pallet wood into various shapes (squares, triangles, rectangles) and arrange them on your wall to create a unique geometric pattern. You can paint them different colors for a pop of vibrancy or leave them natural for a more rustic look.

Rustic Framed Art

Create a simple frame using pallet wood and insert a piece of fabric, a patterned paper, or even a pressed flower arrangement for a rustic yet elegant look.

Layered Shelves

Stack several pieces of pallet wood horizontally to create a floating shelf. This isn't just functional; it's also a stunning piece of wall art that doubles as storage!

Textured Wall Panels

Arrange various-sized pieces of pallet wood to create a textured wall panel. This is a fantastic way to add visual interest to a blank wall. You can paint it or leave it natural depending on your style.

Finishing Touches: Protecting Your Creation

Once you've created your masterpiece, don't forget to protect it! A clear sealant will help to prevent the wood from warping or getting damaged and will enhance its longevity.

Commonly Asked Questions

Q: Are all pallets safe to use indoors?

A: No. Always check for the HT stamp, which indicates the pallet has been heat-treated and is safe for indoor use. Avoid pallets treated with chemicals.

Q: What kind of paint should I use on pallet wood?

A: Acrylic paints are a great choice as they adhere well to wood and are available in a wide range of colors.

Q: How do I clean pallet wood effectively?

A: Use a stiff brush or wire brush to remove loose dirt and debris. Then, wash with soap and water, ensuring the wood is thoroughly dry before sanding and painting.

Q: Is it difficult to work with pallet wood?

A: It can be a bit challenging due to the nails and potential splinters, but with the right tools (safety glasses, gloves, hammer, pry bar, sandpaper) and a little patience, it's manageable.

Q: Where can I find inspiration for pallet wood projects?

A: Pinterest, Instagram, and other DIY websites are great sources for inspiration! Search for "pallet wood wall art" or similar terms for a wealth of ideas.

So there you have it! A deep dive into the world of modern pallet wood wall art. Get creative, have fun, and don't be afraid to experiment! Let me know in the comments if you have any questions, and most importantly, show me your amazing creations!

Distressed Wooden Signs

Posted by pendi with No comments

The Enduring Allure of Distressed Wooden Signs: A Study in Aesthetics and Craftsmanship

Distressed wooden signs represent a unique confluence of rustic charm and deliberate artistry. Their appeal transcends mere signage; they embody a narrative, whispering tales of weathered time and enduring craftsmanship. This exploration delves into the multifaceted nature of these captivating artifacts, examining their aesthetic qualities, the techniques employed in their creation, and their enduring place within contemporary design.

The Aesthetics of Distress: A Deliberate Imperfection

The beauty of a distressed wooden sign lies not in its pristine perfection, but rather in its carefully cultivated imperfections. The signs' visual allure derives from a controlled degradation, a simulated passage of time that evokes a sense of history and authenticity. This deliberate aging process transcends mere wear and tear; it's a meticulously crafted aesthetic that communicates a sense of character and provenance.

The Spectrum of Distress Techniques

The creation of a distressed effect involves a range of techniques, each contributing to the overall visual narrative. These techniques are not haphazard; they are strategically applied to achieve a specific aesthetic outcome. A subtle crackle might suggest gentle aging, while pronounced chipping and peeling paint can evoke a sense of weathered resilience. The artistry lies in the balance and harmony of these techniques.

  • Sandblasting: This technique, often used on the wood itself, removes surface material, creating a worn and textured look. The level of sandblasting can be carefully controlled to achieve varying degrees of distress.
  • Paint distressing: This involves applying multiple layers of paint, then selectively removing portions to reveal underlying layers. Techniques like dry brushing, chipping, and crackling create depth and visual interest. The choice of paint colors further influences the overall aesthetic, from muted earth tones to vibrant, contrasting hues.
  • Wood burning: Controlled burning adds depth and texture to the wood, creating subtle shadows and enhancing the natural grain. This technique adds a layer of complexity that accentuates the organic nature of the material.
  • Chemical treatments: Certain chemicals can be applied to the wood to create a weathered or aged appearance. These treatments can accelerate the natural aging process, creating effects that would otherwise take years to achieve.

Materials and Methods: A Craftsman's Approach

The creation of a distressed wooden sign is a meticulous process that demands both artistic sensibility and technical skill. The choice of materials and the precision of the techniques employed significantly impact the final aesthetic and the longevity of the piece. The craftsman's understanding of wood types, paint properties, and aging techniques is crucial to achieving a desired effect.

Wood Selection: The Foundation of Durability

The selection of the wood itself is paramount. Hardwoods such as oak or pine are favored for their durability and ability to withstand the rigors of the distressing process. The grain and texture of the wood contribute significantly to the overall aesthetic. The choice of wood reflects not only the desired aesthetic but also the intended lifespan of the sign.

Paint and Finishes: Enhancing the Visual Narrative

The paints and finishes applied are carefully chosen to complement the wood and the desired level of distress. Oil-based paints, for instance, often provide a more authentic aged appearance, while acrylics offer greater versatility and quicker drying times. The application techniques, as previously discussed, further contribute to the overall distressed effect. The use of protective finishes, such as varnishes or sealants, is essential to protect the sign from the elements and ensure its longevity.

The Importance of Typography and Lettering

The lettering and typography on a distressed wooden sign are integral components of its overall aesthetic. The choice of font, size, and style contributes significantly to the sign's narrative. A rustic, hand-painted font might enhance the antique character, whereas a more modern typeface could create a striking contrast. The precision and skill of the lettering contribute substantially to the sign's visual appeal.

Distressed Wooden Signs in Contemporary Design

The enduring appeal of distressed wooden signs extends beyond their nostalgic charm. They seamlessly integrate into diverse design contexts, offering a unique blend of rustic authenticity and contemporary sophistication. Their versatility allows them to serve a range of purposes, from functional signage to decorative art pieces.

Applications in Residential and Commercial Settings

In residential settings, distressed wooden signs can add a touch of rustic charm to kitchens, living rooms, or entryways. They can display house numbers, family names, or inspirational quotes. In commercial settings, these signs offer a unique and memorable way to enhance branding, showcasing a rustic aesthetic that resonates with customers seeking authentic experiences.

The Evolution of Style and Trend

The style of distressed wooden signs has evolved over time, reflecting changing design trends. While traditional styles remain popular, contemporary interpretations often incorporate bolder colors, more graphic designs, and innovative distressing techniques. The use of reclaimed wood and sustainable materials further aligns the craftsmanship with contemporary eco-conscious design principles. The versatility of the medium allows for continuous innovation and artistic expression.

Conclusion: A Timeless Appeal

Distressed wooden signs represent more than just signage; they are tangible expressions of artistry, history, and enduring craftsmanship. Their appeal stems from the carefully cultivated imperfections, the meticulous techniques employed, and their remarkable ability to seamlessly integrate into diverse design contexts. The enduring popularity of these unique pieces reflects a continued appreciation for authentic materials, handcrafted quality, and the compelling narrative of time's passage. As design trends evolve, the enduring allure of distressed wooden signs remains a testament to the enduring power of timeless aesthetics.

DIY Pallet Wood Wall Projects

Posted by pendi with No comments

Unlock Your Inner Artist: Amazing DIY Pallet Wood Wall Projects

Hey there, fellow DIY enthusiasts! So you've got a pile of reclaimed pallets sitting around, gathering dust? Don't let them gather any more! Pallet wood is a fantastic, affordable material bursting with rustic charm, just begging to be transformed into something amazing. Let's dive into the world of DIY pallet wood wall projects â€" there's something for every skill level, from beginner-friendly to more advanced creations.

Preparing Your Pallet Wood: The Foundation of Success

Before you get your creative juices flowing, let's talk prep work. This isn't the most glamorous part, but it's crucial for a long-lasting and beautiful final product. Think of it as the foundation for your masterpiece!

Cleaning and Disassembly:

First things first: safety! Wear gloves and eye protection when disassembling your pallets. Some may have old nails or staples that could cause injury. Carefully take apart the pallet, removing any loose nails or staples with a claw hammer or nail puller. Once you've got your individual planks, give them a good scrub. A stiff brush, some soapy water, and maybe a pressure washer (if you've got one) will work wonders in removing dirt, grime, and any lingering bits of debris. Let them dry completely before moving on.

Sanding: The Smoothing Process

This is where the magic happens (or at least, where the smoothness happens!). Sanding down your pallet wood is essential for a clean, professional look. Start with a coarser grit sandpaper (around 80 grit) to remove any splinters or rough patches. Then, gradually move to finer grits (120, then 220) for a smoother finish. You can do this by hand, but a power sander will significantly speed up the process â€" especially if you're working with a lot of wood.

Treating Your Wood: Protecting Your Investment

Once your wood is clean and smooth, it's time to protect your hard work! A good quality wood sealant or stain will not only enhance the natural beauty of the wood but also protect it from moisture, pests, and wear and tear. Choose a sealant or stain that complements your desired aesthetic â€" you could go for a natural look, a vibrant color, or something more rustic and weathered. Follow the manufacturer's instructions carefully for best results.

Easy Pallet Wood Wall Projects for Beginners

Feeling a little intimidated? Don't worry! These projects are perfect for newbies, requiring minimal tools and experience.

A Rustic Headboard:

This is a classic and surprisingly simple project. Simply arrange your prepared pallet wood planks to create a headboard of your desired size and height. Secure the planks together with wood glue and screws, and attach sturdy brackets to the back for easy mounting to your wall. A quick coat of stain or sealant, and voila! You have a unique and beautiful headboard.

A Charming Accent Wall:

Transform a plain wall into a statement piece! Arrange your pallet wood planks vertically or horizontally, depending on your preference, leaving small gaps between each plank for a more rustic look. Secure them to the wall using strong adhesive or nails. This is a fantastic way to add character and texture to any room.

Intermediate Pallet Wood Wall Projects: Level Up Your Skills

Ready to challenge yourself a bit? These projects involve a little more precision and creativity.

A Stunning Pallet Wood Art Display:

Create a unique art display by arranging your pallet wood planks in an interesting pattern, creating geometric shapes or free-form designs. You can then paint, stain, or decoupage the planks to add even more personality. This is a great way to show off your creativity and showcase your favorite artwork or photos.

A Functional Pallet Wood Shelf:

Add some practical storage to your wall with a DIY pallet wood shelf. By carefully cutting and assembling the planks, you can create shelves of various sizes and shapes. Adding brackets or supports will ensure stability and prevent sagging. You could even add some cute little hooks for hanging mugs or keys.

Advanced Pallet Wood Wall Projects: For the True DIY Enthusiast

Feeling confident? Let's tackle some more ambitious projects that will truly showcase your DIY prowess.

A Full Pallet Wall:

Go big or go home! Cover an entire wall with your reclaimed pallet wood for a dramatic and impactful statement. This project requires meticulous planning and careful execution, but the results are truly stunning. Remember to consider the weight of the pallets and ensure proper wall support before you begin.

A Custom Pallet Wood Mirror Frame:

Add a unique touch to your bathroom or bedroom with a custom-made pallet wood mirror frame. Cut and assemble the planks to create a frame that complements the style of your mirror. You can sand and paint it in any color that suits your preference.

Creating a Pallet Wood Feature Wall with Built-in Lighting:

This project requires some electrical knowledge, so only attempt this if you're comfortable working with wiring. This is a statement piece, incorporating lighting to highlight the texture and design of your pallet wood feature wall. You can create recessed lighting, or even use fairy lights for a softer glow.

Commonly Asked Questions

  • What kind of paint is best for pallet wood? A good quality exterior-grade paint is recommended for durability. Consider using a primer first, especially if you're painting over a dark stain.
  • How do I prevent the wood from warping? Ensure the wood is properly dried before use. Using a quality sealant or wood conditioner can help prevent warping.
  • Are there any safety concerns? Always wear safety glasses and gloves when working with pallet wood. Be careful of nails and splinters.
  • Where can I find free pallets? Check with local businesses, construction sites, or even post on social media asking if anyone is discarding pallets.
  • What if I don't have a lot of tools? Many of these projects can be adapted to work with basic hand tools. However, power tools will make the process significantly easier and faster.

And there you have it! A whole world of DIY pallet wood wall projects waiting to be explored. Remember to have fun, be creative, and don't be afraid to experiment. Happy crafting!

Kamis, 08 Februari 2024

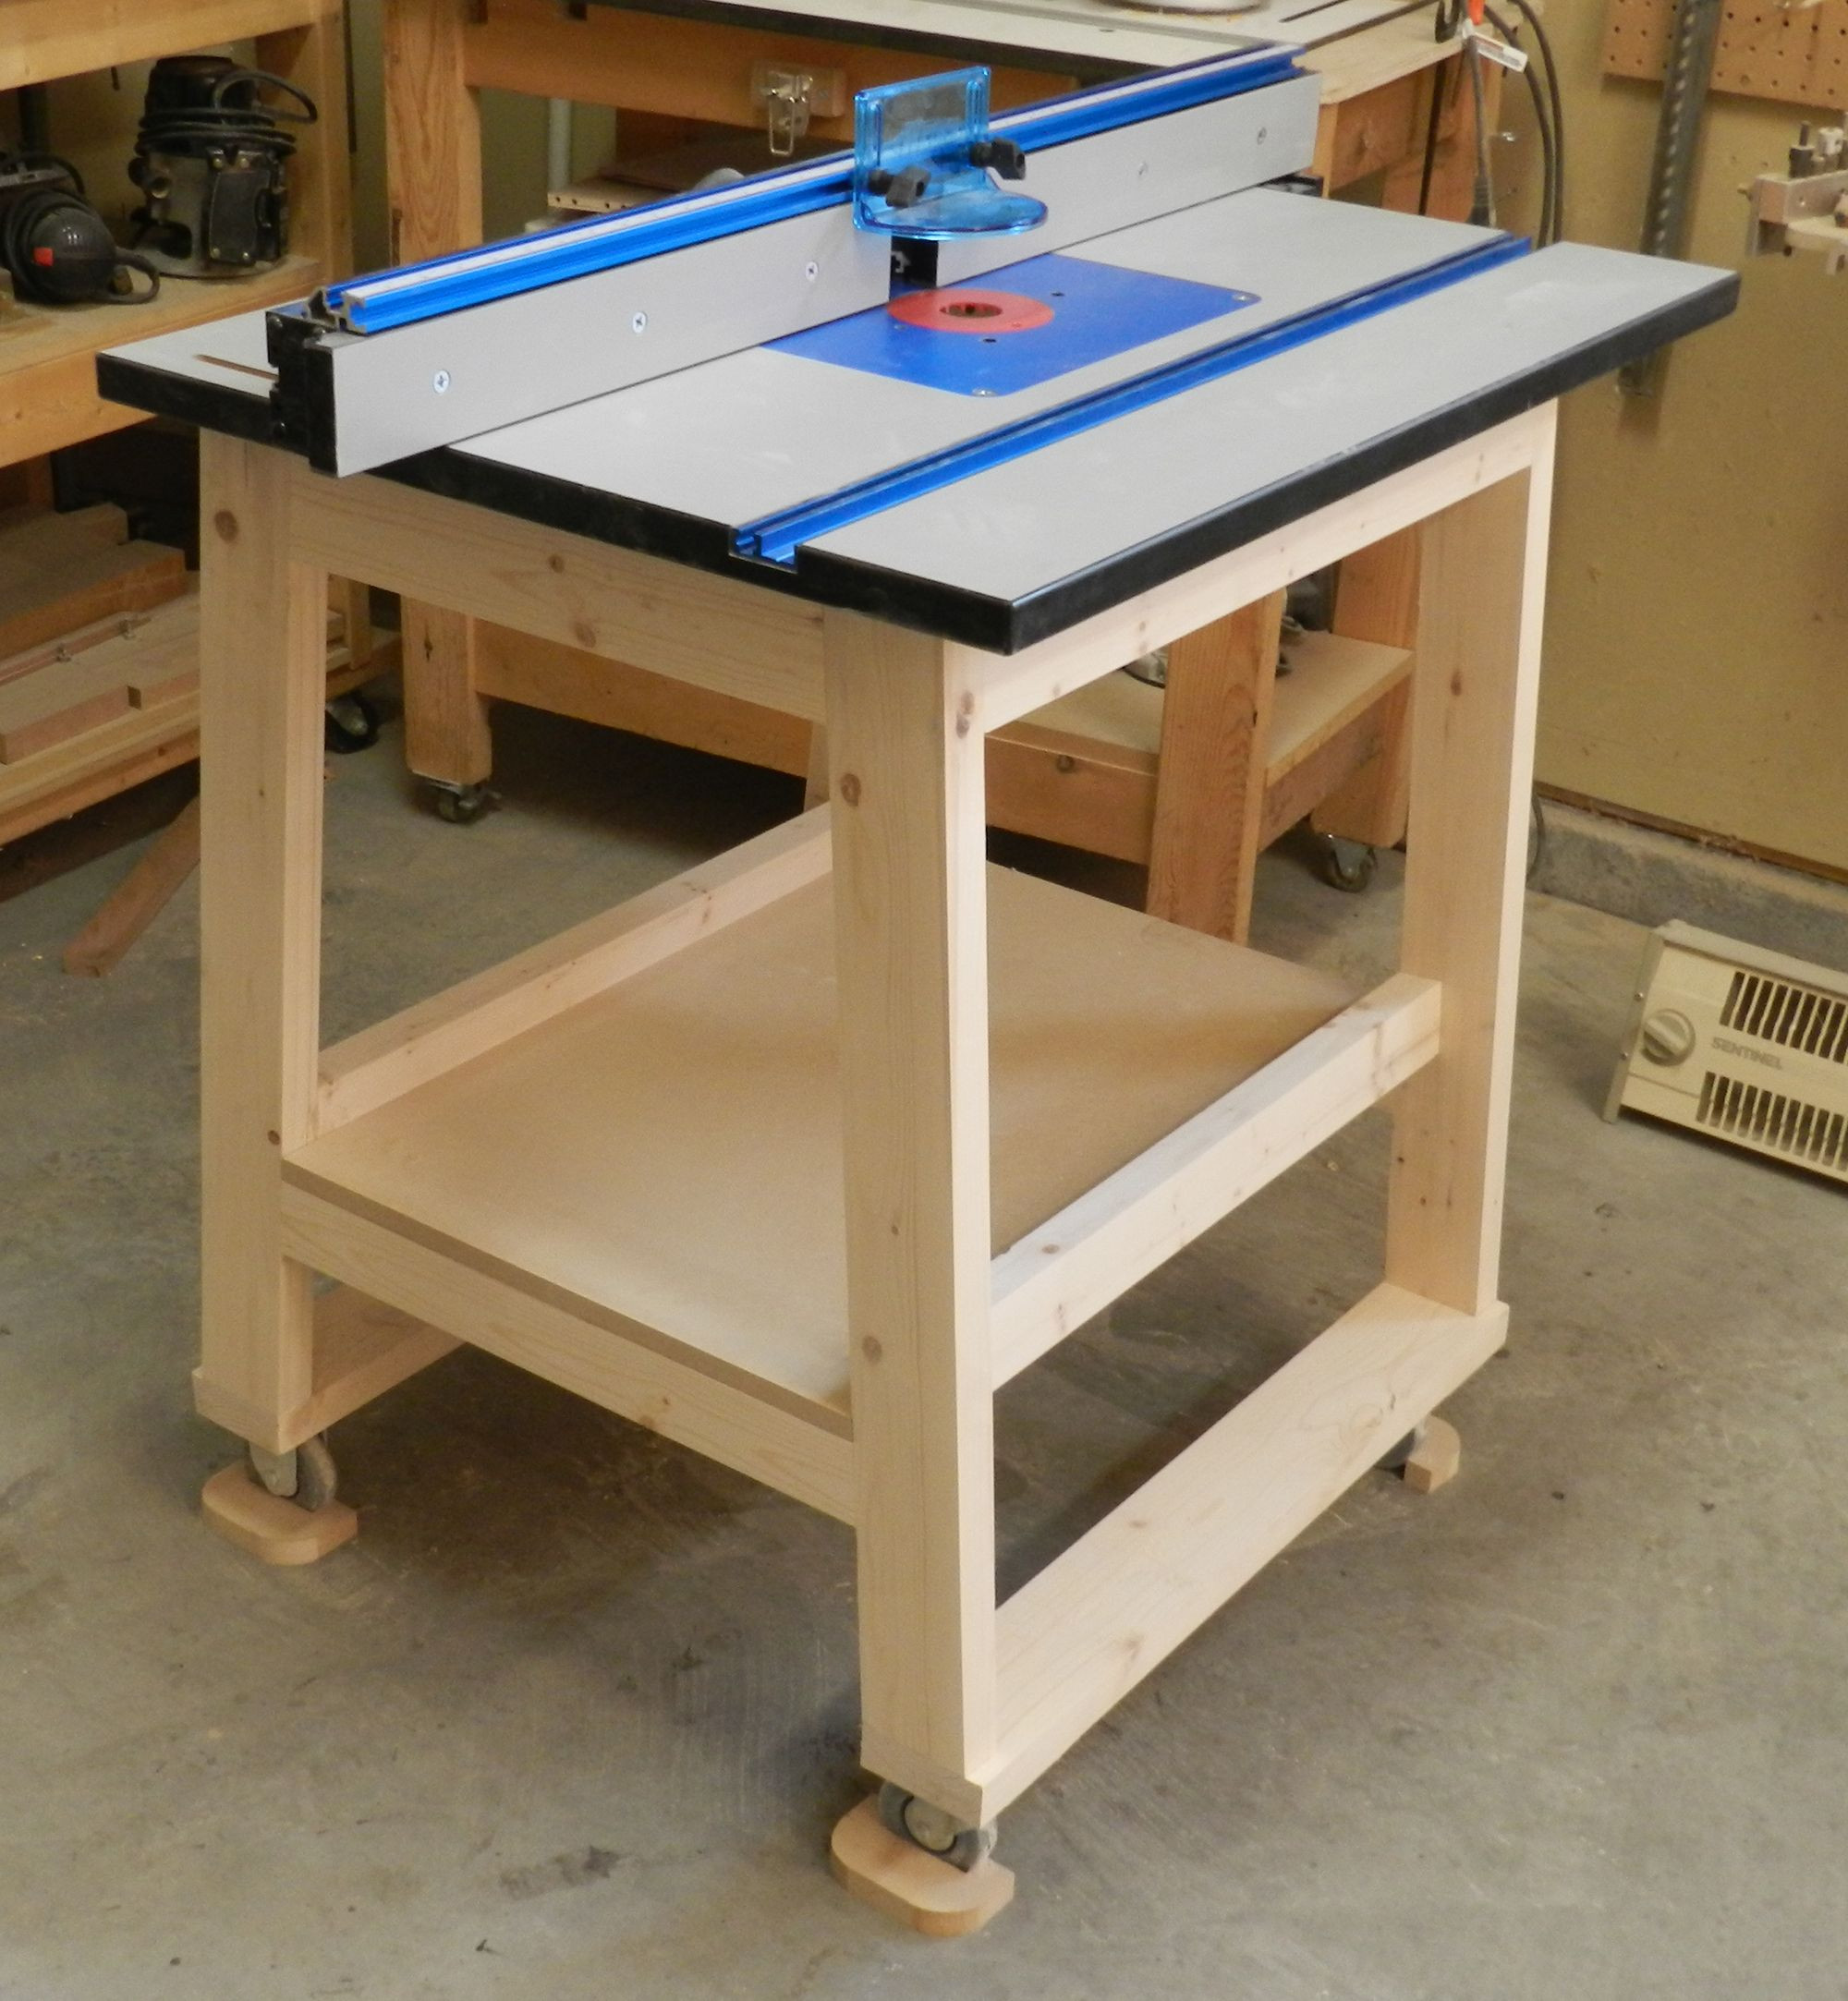
Plans for router table top

Posted by pendi with No comments
Plans for router table top
DIY Router Table plans » Famous Artisan

It’s a round table, able to expand its diameter merely by rotating the top. A gloriously engineered bit of mechanics move the leaves of the tables out while simultaneously raising the inner part

Wisdom Unveiled Plans for router table top

Bundle includes Bosch 1617EVSPK Router, RA1181 Benchtop Router Table, and RA1054 Deluxe Router Edge Guide Electronic variable speed plunge and fixed base router kit; soft start, micro-fine depth

10 Best Benchtop Router Tables
Top 25 Diy Router Table Plans - Home, Family, Style and Art Ideas

Move the router around the table, and the Shaper takes care of the rest. Accuracy, at least in earlier versions, is said to be on the order of a hundredth of an inch. That’s good enough for wood Organizing a garage isn't a one-size-fits-all project, so we've compiled some of our best garage storage ideas. Check out these tips to find ways to make your garage more organized and better to use. A reliable home internet connection has never been more important. Many of us work from home part-time or full-time now, and others increasingly have more of their home powered by smart devices. Also,

A Handheld CNC Router
Router table plans | Router table plans, Build a router table, Diy

Available for $100 or less if you catch a sale, the TP-Link Archer AX21 is an entry-level, dual-band Wi-Fi 6 router that supports top speeds of up to 1,201Mbps 1.2Gbps on its 5GHz band. If you're looking to save money on your wireless bill, these lesser-known, lower-cost cell phone plans might be the ticket. I love portable technologyâ€"if you can put it in a pocket or a bag

46 Garage Storage Ideas You Can DIY
Benchtop Router Table Plans - Router Tips, Jigs and Fixtures

But picking the right plan can be complicatedâ€"nationwide, insurance providers offered a total of 4,064 different Medicare Advantage plans in 2023 alone, and finding the right insurance plan is Plan G is the best Medigap policy for new enrollees, but it's also one of the more expensive plans, averaging $145 per month for 2023. Our experts at 1-855-915-0881 TTY 711 can help you find the right

Plans for router table top - to assist you to improve the eye of our tourists also are incredibly to help make this site. increasing the standard of this content could people try on a later date to help you genuinely recognize following scanning this publish. As a final point, it is far from one or two thoughts that needs to be created to influence anyone. however , with the boundaries for terms, we are able to just existing the actual A Handheld CNC Router argument all the way up in this case